To collect data on the use of our platform, how the number of users, sessions, conversions or actions carried out by users on the website, tags are used in the page code. These tags, which are fragments of JavaScript code, allow collecting information and send it to third parties, such as Google Analytics.
The information collected by these tags allows us to consult analytics in Google Analytics, track Google Adwords or Social Ads and learn much more about the behavior of users on our training platform.
Definitely, it can be a very cumbersome task for those who do not have technical knowledge, since it is necessary to edit the code of our platform to add these tags. Even if we want to add tags from different platforms, it can affect the performance of our website, making it slower to load.
Luckily, there are solutions like Google Tag Manager (GTM) that, as its name suggests, allows you to manage all your tags from the same place quickly and easily.
In Google Tag Manager you can configure all your tags and create a single code to include on your website and collect all the activity.
At Foxize Cloud we want to go one step further to facilitate access to the analytics of your online school, and to link your platform with Google Tag Manager you just have to enter a container ID provided by GTM in the platform administrator, and it will be linked automatically, all without having to touch the code of your website.
We explain step by step how to configure Google Tag Manager for your online school.
But first… think of a measurement plan
Before setting up Google Tag Manager, it is important to create a solid measurement plan for your training platform. Decide what metrics you want to achieve (users, income, traffic sources) to understand the behavior of your users on your website.
These metrics will help you make decisions that benefit your training business, for example for advertising campaigns for courses, promotions on social networks, or to know which courses have more registrations and which do not.
Configure Google Tag Manager
To configure our Google Tag Manager, we must first create a new container. The container will gather all the tags that we want to link to our platform.
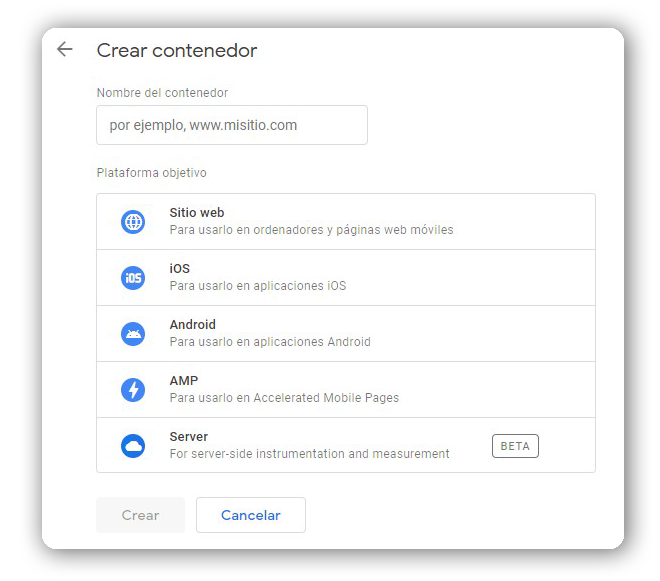
Once created, we will enter the workspace of that container, by clicking on its name.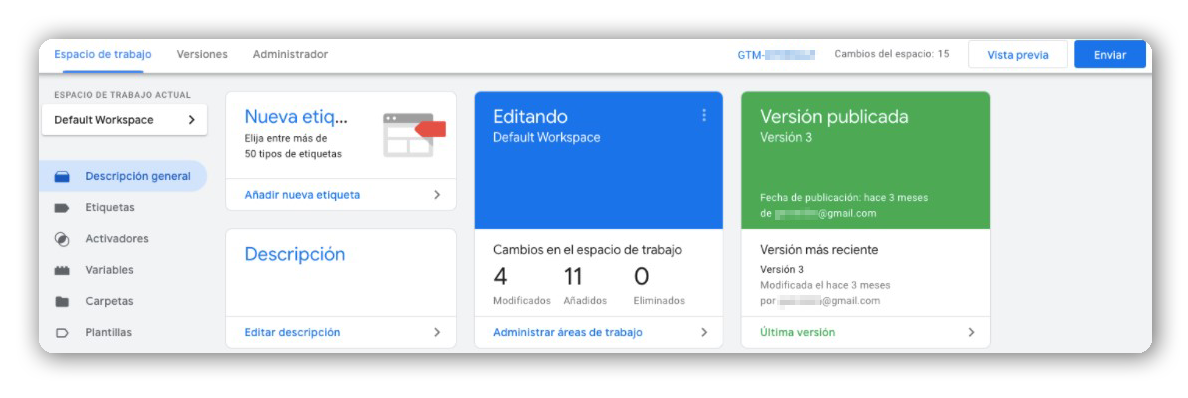
One of the options it offers us is "Add a new tag". When you click, it will open a tab where you can configure it.
We will give it a name, and then we will click on "tag configuration", where we will have to choose the type of tag. As you can see, GTM allows you to add tags from many pages, both Google's own (Google Analytics, Google Ads, Floodlight or Google Surveys) and external ones (Linkedin insight, Twitter, Foxmetric, etc).
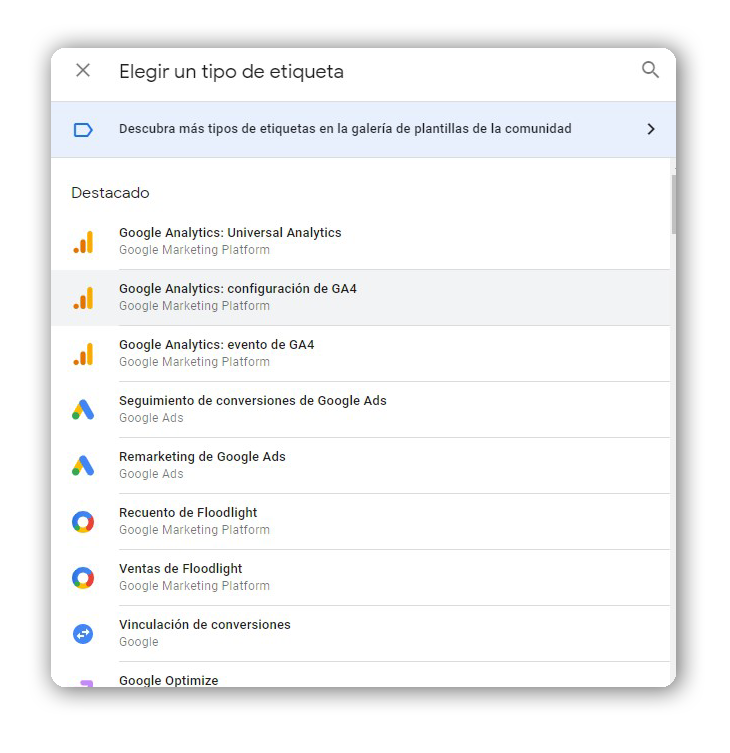
For this example, we will select Google Analytics Universal.
Next, we must choose what type of follow-up this tag will do on our website: page view, event, transaction, social, etc. We will choose "Page view", to know the base information of traffic on the web.
The next step will be to configure the variable, that is, the information that we want GTM to use for that tag.
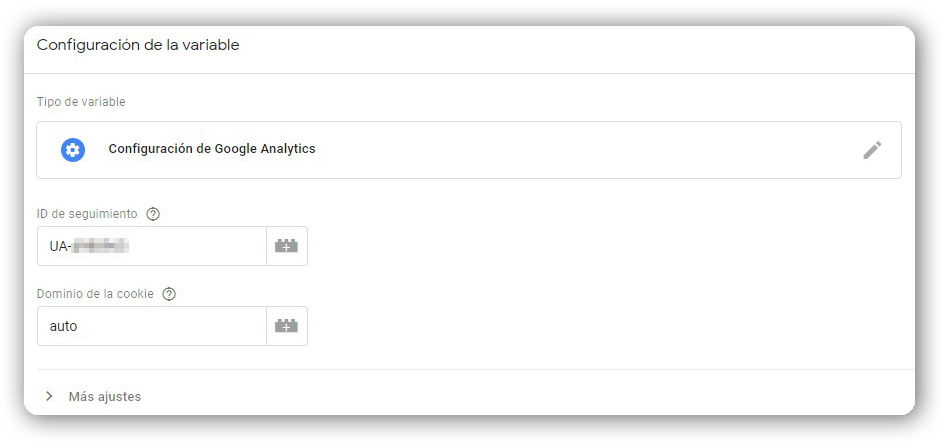
In our case, when using Google Analytics, we must enter the tracking ID that we can find on the GA website, which will begin with "UA".
If we want to detail more how this tag will work, we can display the "advanced configuration" tab to define more parameters.
To finish configuring the tag, we must select the trigger, that is, when and where we want the Google Analytics tag to work. In our case, we will select "All pages" to collect the visits of all the pages.
We already have a tag configured. We can add as many as necessary.
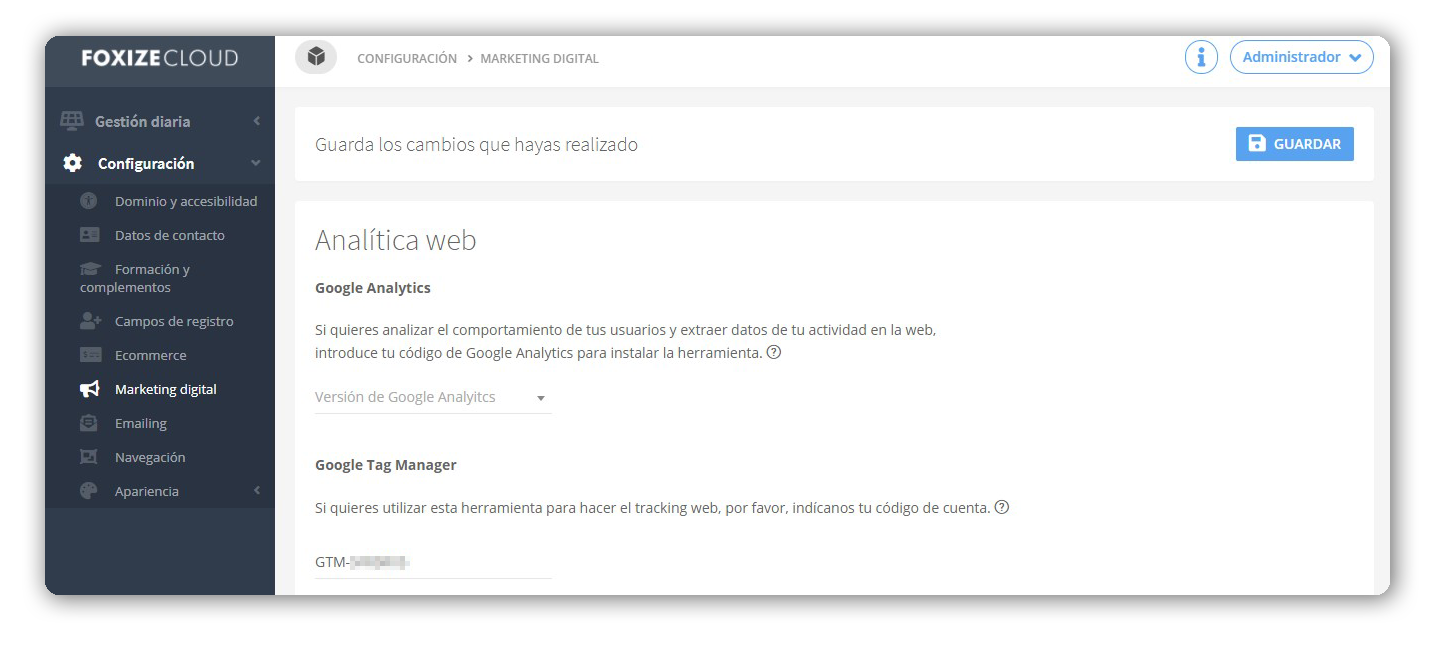
Once they are all configured, we can link Google Tag Manager to our training platform. To do this, it is as simple as copying the GTM code that you will find at the top of the workspace and copying it in the "Settings> Digital Marketing" section of your platform administrator.
If you still don't have your own training platform, we offer you a free month of our Foxize Cloud LMS, without obligation, so you can start setting up your school.
Finally, we must activate the labels. To do this, we will return to Google Tag Manager and click on the "Submit" button in the work panel and then "publish", thus activating the code on the web.
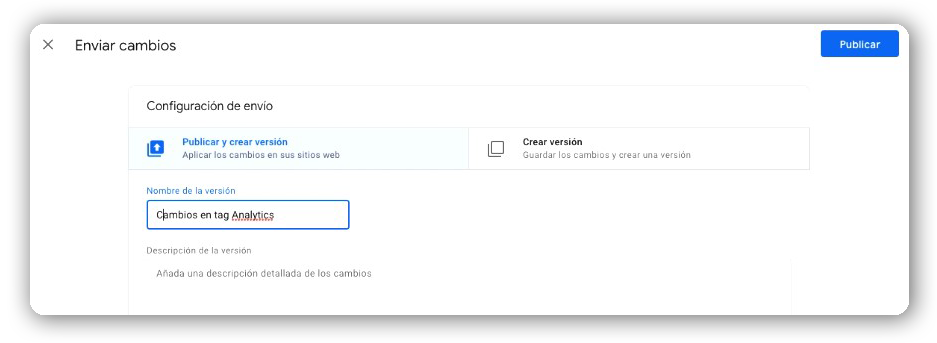
You already have your Google Tag Manager configured.
Keep in mind that if you have GTM configured with Analytics, it is not necessary that you also have the Google Analytics code on your platform, since you will be sending the same information twice.
As you can see, Google Tag Manager is a tool that, if we know how to use it, allows us to get a lot of information to apply it in our campaigns and strategies.

