Since the beginning of the coronavirus pandemic and lockdown, businesses and schools have had to search for alternatives to continue with teaching and training activities.
Many of them have moved to online training and e-learning. ¿But what about those live courses that rely heavily on teacher-student interaction? In some courses, feedback and interaction are essential. Webinars are allowed to perform these kinds of courses during the lockdown.
Zoom has become one of the most used communication tools during these times, and it has reached the educational level. Even Foxize Cloud has integrated Zoom in their LMS.
If you want to develop your own webinars with Zoom, this article will help you.
Schedule meetings and webinars with Zoom
First of all, you have to create a Zoom account (if you don't have one already). Go to zoom.us and click on “Register” for free.
Once your account has been created, you can schedule a meeting or a webinar with zoom. Everyone can create a meeting with Zoom, but webinars are only available for Pro, Business or Edu accounts.
Let's create and schedule a meeting step by step.
First step: Access your account (top right corner) to manage your meetings.
On the left menu, click on “Meetings”. You’ll find all the scheduled meetings with their time, title and ID. ID is very important, since it is what links our Zoom Meeting to our training platform.
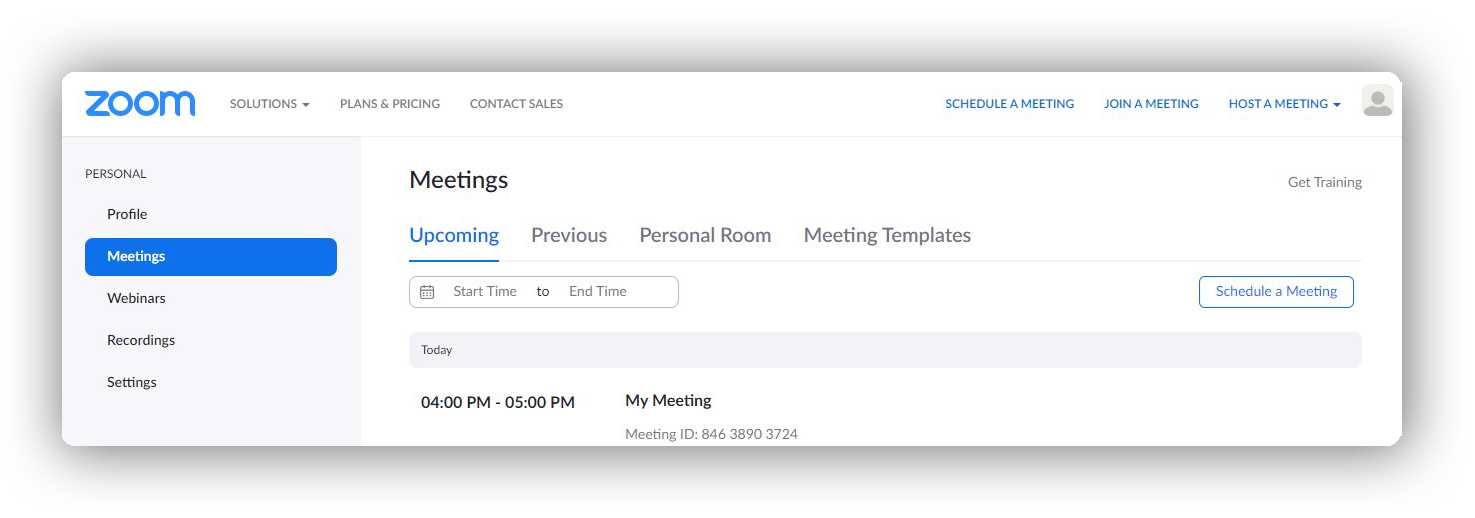
In this section we can check our meeting history. Moreover, Zoom offers each user a personal room that is always available (no schedule needed), useful if a spontaneous tutorship is needed.
Second step: To schedule a Zoom meeting for an online webinar, click on the “Schedule a new meeting” button.
Here you will be able to set up your meeting. Introduce a name, a description, and the date and time the webinar will take place.
We recommend setting the time 15 minutes earlier so students and teachers can have time to prepare.
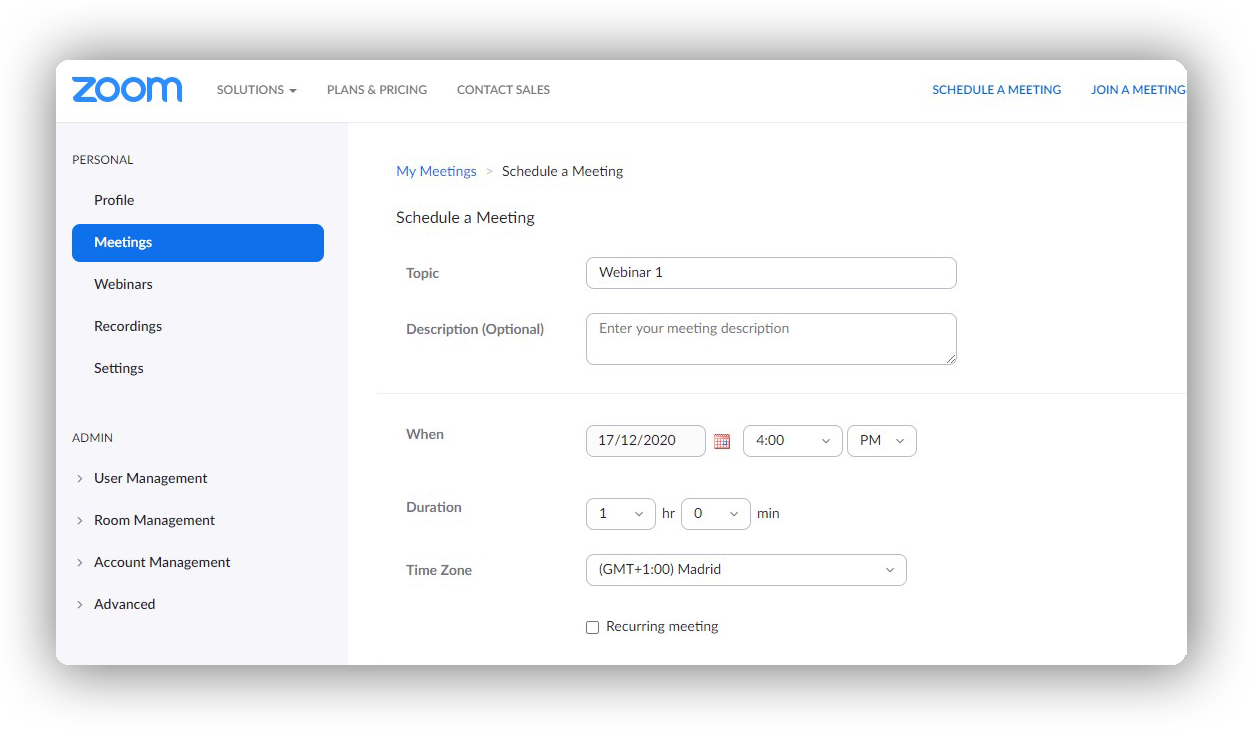
Next, add the meeting duration. If you are using a free account, your sessions will be up to 40 minutes only.
It is very important to write down a duration because that’s the only way the LMS Foxize Cloud can track students progress. The course won’t be completed until the student has watched at least 75% of the webinar. This is important because in the case of being a sequential course if the student has not completed the material, they will not be able to finish the course, comment or rate.
We also recommend that you extend the duration by another 10 or 15 minutes, in case interesting or unforeseen questions arise.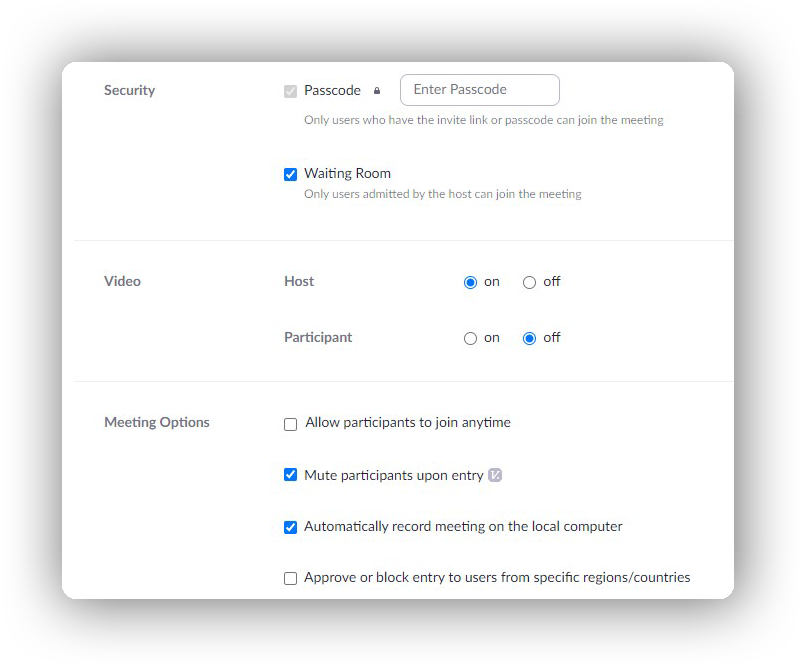
You can define your Zoom meeting with these options:
- If it’s a recurring meeting or not.
- ID configuration. We recommend you set it to “generate automatically”.
- Add a password to access the zoom meeting. If you are using this, make sure you share it with your students via email, for example.
- Video settings. Allow everyone to use webcams or just the teacher.
- Enable a waiting room before the meeting starts.
- Mute students microphones when they join the meeting
- Automatically record the meeting, to upload it as course material afterwards.
Once everything is set up, don’t forget to save.
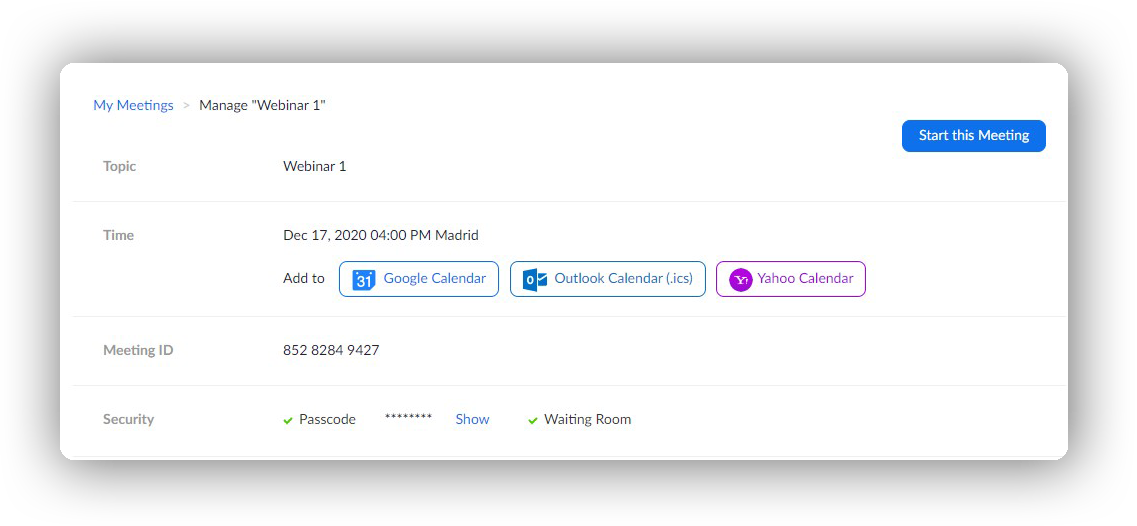
Third step: to link the Zoom meeting with your training platform, you just have to copy the meeting ID and add it to your Zoom material in your course. It is that easy.
Another important aspect to take into account when we are preparing our Zoom meeting is to check the limit of users that we have contracted with Zoom. If the number of registrants exceeds the limit of users, many of them will not be able to access the webinar. That is why we recommend that, in the course file, you limit the number of people enrolled, or change your Zoom plan to expand the number of participants.
We also recommend that you activate the option to “access the course material before the course date” so that enrolled students can access the course before the webinar begins so that everyone will be prepared.
Once the day of the Webinar comes, you’ll only have to start the meeting, and students will be able to access it through your online training platform.
Interfaz de Zoom

When using Zoom, these are the main options you’ll have access to while in a meeting or webinar.
- Mute/ Unmute your microphone
- Show webcam
- Security: create a waiting room or block the meeting. You can set up participant permissions, like allowing webcams, mics or chat.
- Participant control: the list of all the participants.
- Share screen.
- Chat: access to chat. This is usually the main medium where participants can communicate with the teacher.
- More: other settings.
- End meeting.
Hope this guide has helped you to understand Zoom better. If you want to create your own online training platform with webinars, we offer you 1 month for free of our LMS.
